French Onion Soup

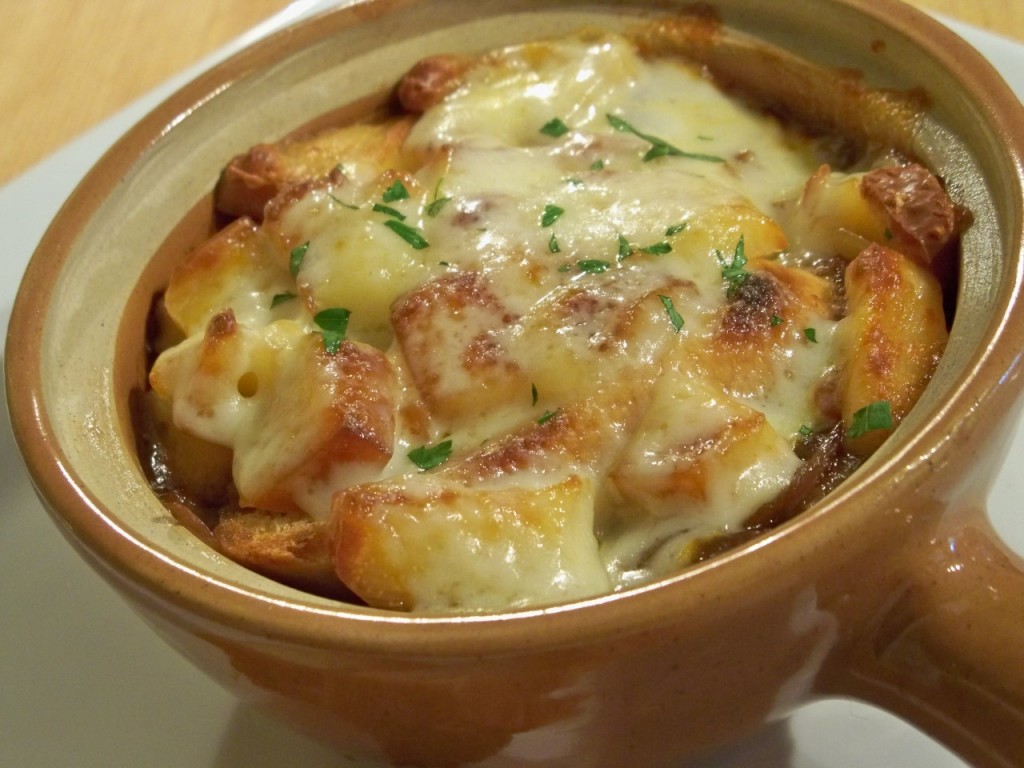
With Fall fast approaching I have been craving anything to do with soup! One thing you will definitely know how to make when you leave cooking school is French Onion Soup. I’ve made it several times in cooking classes now and each time I learn a slightly new twist on how to make it. French onion soup isn’t hard to make, it really is all in the method. The most important part of making the soup is making sure the onions are sautéed until they are jam-y and brown. The natural sweetness that comes from cooking onions this way is wonderful!
I topped my soup with little cubes of Gruyère cheese but shredded or sliced cheese would work just as well or better.
This would be perfect for a chilly Fall night!
Also, you will see below that cognac is called for in the recipe. You can get a small bottle of cognac for as little as 5 dollars. If you only plan on using it for this soup, you will get a couple of batches out of it!
Enjoy!
Prep Time: 15 minutes
Cook Time: 40 minutes

French Onion Soup
Inspired by: On Cooking 5th Edition
Serves 4-6

3 tablespoons butter
5 softball sized onions, sliced thinly (yellow, vidalia or any sweet onion would be best)
1/2 teaspoon salt
3 cups fresh or low sodium beef stock
3/4 cup red wine
1/4 cup cognac
1/4 tsp ground thyme
salt and pepper to taste
Gruyère or Swiss Cheese (1/4 cup shredded or two slices per bowl)
Baguette slices to fit bowl (1-2 per bowl, depending on size of your bowl)

In a large pot melt butter over medium heat. Add sliced onions and 1/2 teaspoon of salt. Cook over medium heat, stirring occasionally until onions become deep brown in color and reduce significantly in volume. This should take about 15-20 minutes. Don’t try to cheat and turn up the heat to brown the onions! They need time to become softened and really become sweet.
Once onions are ready, add red wine, cognac and beef stock.
Let simmer for 15-20 minutes.
Add thyme, season to taste with salt and pepper.
Preheat broiler on oven to highest setting.
Slice baguette into slices and toast under broiler until golden brown. Remove from oven.
Portion out your soup into crocks, ramekins or oven safe bowls.
Top with 1-2 slices of toasted baguette. Then top with shredded cheese or sliced cheese.
Place soup bowls on a baking sheet and transfer to oven. Allow to broil until cheese is melted and bubbly brown.
Serve immediately.
Be careful of your tongue! It is delicious but hot! 🙂

Posted in General Announcements, Soups | 8 Comments

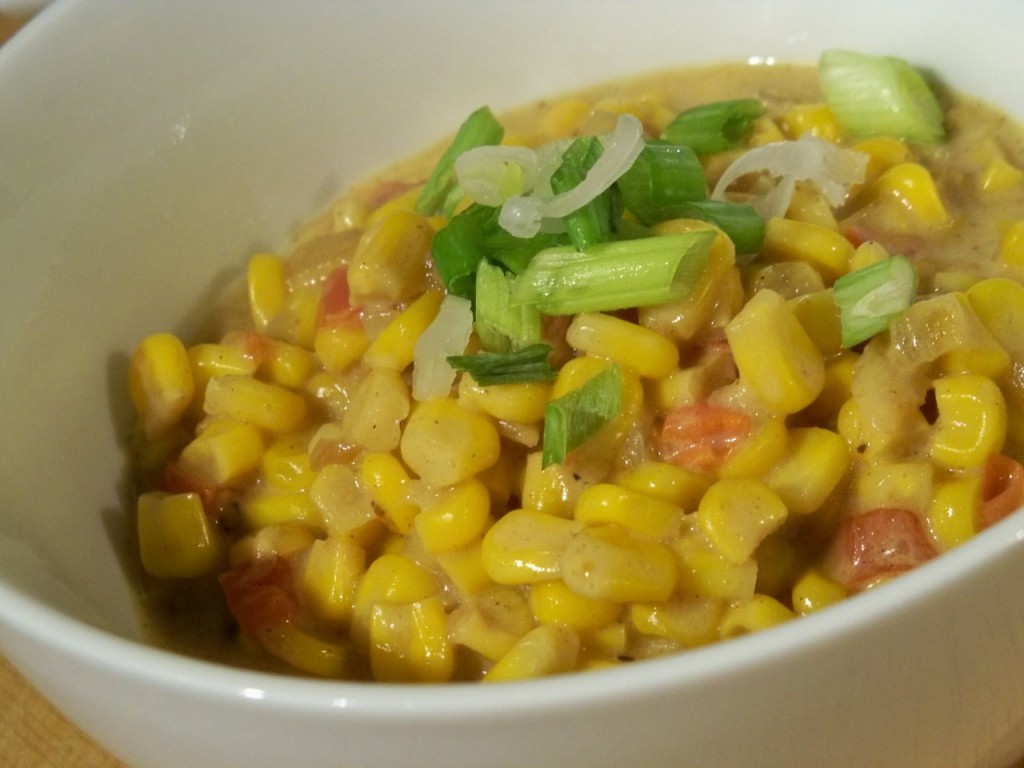
Curried Corn

There are so many things about culinary school that I love. I’ve made some amazing friends who are just as passionate about food as I am. I’ve also been blessed to learn under Chefs who I really admire and respect. One of my favorite Chefs teaches my International Cuisine class. We learn about a new country each week cooking as many dishes as we can from regions within that country. Of course, even after making 5-6 dishes a class we barely scratch the surface of food that represents each country. This recipe came from the week we studied African cuisine, this dish (specifically Kenyan) was addictive! It is certainly simple enough to make and the flavor is wonderful! We made this corn to go with our Pan Fried Cod with Cilantro Chile Relish and it paired really well!

Prep Time: 15 minutes
Cook Time: 15 minutes

Curried Corn
Adapted slightly
Source: International Cooking: A Culinary Journey

1 tablespoon oil
1/2 onion diced
2 cloves of garlic, minced
1 1/2 teaspoons hot madras curry powder
1 can coconut milk
1/2 teaspoon cornstarch
1 tomato, seeded and diced
4 cups of corn (I used frozen, drained canned corn would work also)
1/2 teaspoon salt, more to taste
1/4 teaspoon cayenne pepper

1. Heat oil in pan over medium high heat until hot, add onion and garlic, cook stirring occasionally until lightly browned.
2. Add curry powder, stirring to coat well.
3. Add corn, continue cooking a few minutes. Meanwhile combine coconut milk and cornstarch.
4. Add coconut milk-cornstarch mixture and tomatoes, salt and cayenne pepper to corn. Stir well.
5. Lower heat and cook, stirring occasionally, for 7 minutes, or until the coconut milk has thickened and reduced some. Make sure corn is tender.
6. Correct seasonings and serve.

Posted in General Announcements, Side Dishes, Vegetarian Dishes | 1 Comment

Menu: 9/18-9/24

I’m gonna warn you, this week will be hectic, as the surgery we were planning on for last week has been moved to this week. So with hubby in the hospital, my cooking will be limited. Hopefully we are in and out of the hospital in a day or two. But, because I am not sure I am only listing the meals I have planned because I have no idea when we will be home to make them. It’s times like this that I am glad I menu plan or else I would be tempted to eat out or get take out way too much. Have a great week in the kitchen! 🙂

– Chicken Marsala, potatoes of some sort and roasted carrots
Swedish Meatballs over egg noodles
Chicken Burgers with Caesar salad
Flounder with tomato bacon butter, rice pilaf and broccoli
– A rollover from last week, chicken and white bean enchiladas with creamy salsa verde sauce

Posted in Menu Plan Suggestions | 2 Comments

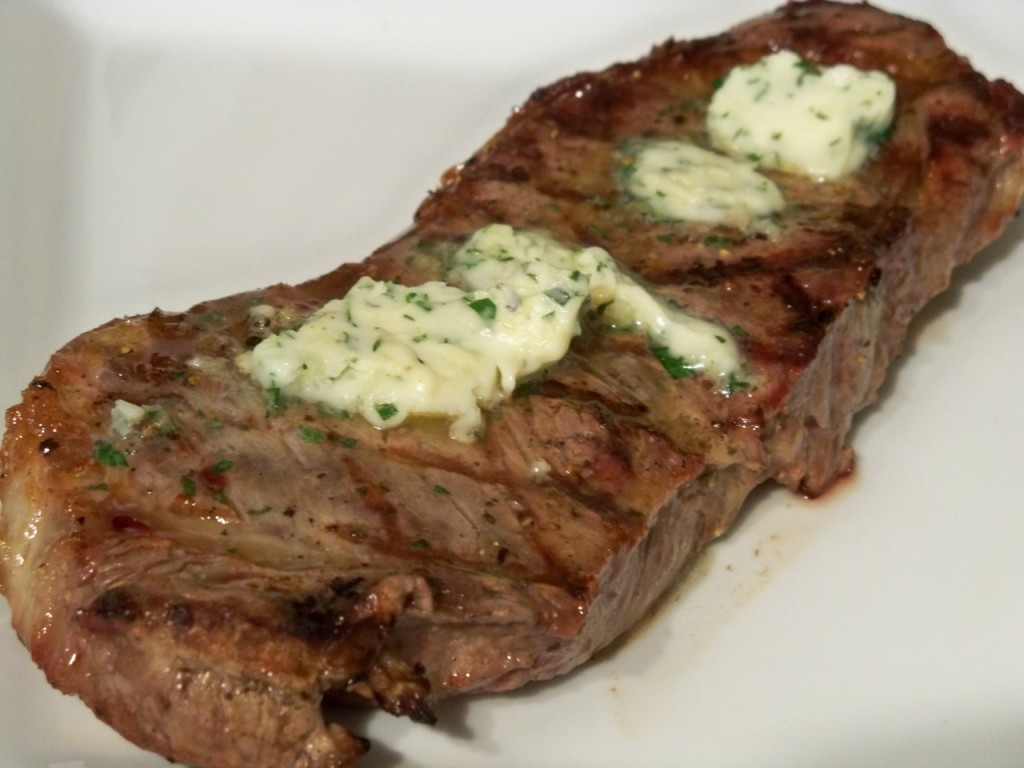
Steak with Garlic Herb Butter

A couple of months ago, I found this great website called Steamy Kitchen. Not only is the woman hilarious but she really knows her stuff too. So I was excited to see a method on her website for making a regular steak taste like prime steak. I was skeptical, but she made such a great argument for the method of salting the steak. After tasting the steak, my mind has been made up! This took about an hour to prepare but I wasn’t even around for 45 minutes of the preparation. That’s not bad!
You. must. try. this. method.
(oh and you will want to bathe in the butter…just saying)
I was going to dress up the picture with extra garnish, lettuce and other pretty stuff but the steak was so freaking beautiful that it just didn’t need it in my opinion.
I would say Enjoy but pish… like that will really be an issue!

Prep Time: 1 hour (10 minutes active)
Cook Time: Varies on your preferred doneness on steak.

Steak with Garlic Herb Butter
Make sure you check out the photos on her website here for step by step photos on salting the steak.

Buy a good-sized Choice steak. I like mine 1.25 to 1.5 inches thick. Any cut of steak: Filet, Sirloin, Rib Eye, Porterhouse, T-Bone and NY Strip – they all work. Though, please remember to get steak that you’d normally buy to grill. Don’t go buying some weird cut like the cow armpit and expect it to taste just like a NY Strip. You can do this with steaks less than 1″, just really watch your timing. If your steak is already superbly marbled – cut back on your timing and your salt! The fattier (more marbled) the meat is, the faster the salt works its way through the meat.

2. Sprinkle 1/2 to 1 teaspoon of kosher/sea salt PER SIDE. Use the photos at beginning of the post as guide on how much salt. For every inch thickness of steak, let sit at room temperature for 1 hour.
•Less than 1-inch steak: 30-45 minutes
•1 inch thick steak: 1 hour
•1.25 inch steak: 1 hour and 15 minutes

If you don’t have that much time — well then, add more salt, cut back the time it sits. It’s all related:

Thickness of meat : Amount of Salt : Time

And vice-versa, if you need to stretch your time, use less salt. Example: the above steaks that are 1.25″ thick – I should salt for 1 hour 25 minutes. But if my timing works out that I’m not grilling for 2 hours – then I’ll cut back on the salt and let it sit for 2 hours.

If you want to salt for more than 2 hours or overnight – sprinkle the steak with 1/2 the amount of salt that I’ve instructed (look at photos for reference), cover with plastic wrap and refrigerate.

3. Rinse all salt off on both sides, pat very dry with paper towels on both sides <- that part is important. Season with fresh ground pepper (no more salt is needed). Grill to your liking. Top with Garlic-Herb Butter immediately to let it oooooze and aaaahhze all over the steak Garlic Herb Butter: 1 stick of unsalted butter, softened (not melted, just softened) handful of fresh herbs (any combination is fine. My fav is basil and parsley) 2 cloves of garlic, smushed in garlic press To make the Garlic-Herb Butter, combine all ingredients. Lay out a sheet of plastic wrap. Spoon butter mixture on wrap. Roll and shape butter into a log. Refrigerate to firm up for 30 minutes. Slice into 1/4” disks to top the grilled steaks. You can make butter up to 3 days in advance. Make sure you use unsalted butter – the steak is seasoned perfectly already.

Posted in Beef Dishes, General Announcements | 4 Comments

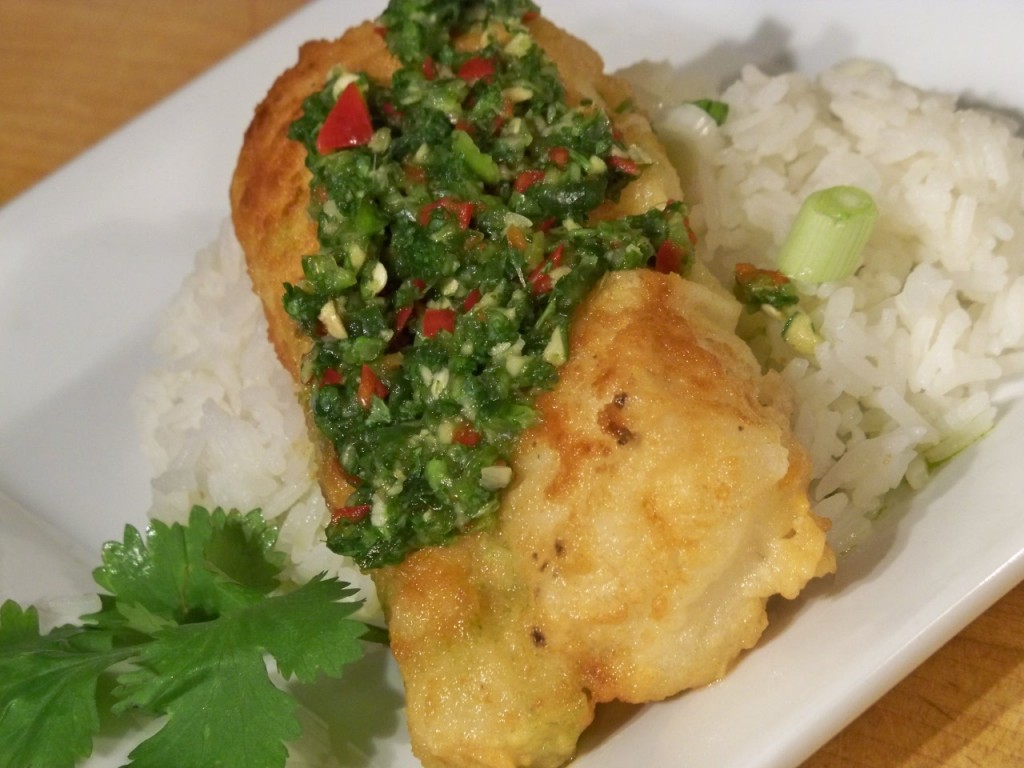
Pan Fried Cod with Cilantro Chile Relish

I got a great deal on frozen cod fillets at Sams the other day. I love cod! It’s a beautiful mild flaky fish and it is fantastic for frying. Since I wasn’t in the mood for fish and chips I decided a nice light, spicy application was in order. I removed the seeds from the chile peppers and it made for a tangy relish with a nice kick.
Even though this was a pan-fried fish, the dish turned out surprisingly light!
Enjoy!

Prep Time: 15 minutes
Cook Time:
15 minutes

Pan Fried Cod with Cilantro Chile Relish
Modified from: This recipe.

2-4 fillets of Cod (or any other hearty white fish)
kosher salt and pepper
2 cups of flour (1 cup if only making two filets)
SAUCE:
1/3 cup water
1/2 Tbsp. tamarind paste (available at Indian/Asian stores) OR substitute 1 Tbsp. lime juice +1/2 tsp. dark soy sauce
3 cloves garlic
1 heaping tsp. brown sugar
1 thumb-size piece of ginger, peeled and sliced
1 cup fresh cilantro leaves and stems
2 Tbsp. fish sauce
1/2 red bell pepper, de-seeded and diced
1-2 fresh red chilies, minced (de-seeded if you prefer less heat)
1 1/2 cups canola or other vegetable oil for deep-frying

Preparation:

1. Pat fish dry. Sprinkle surface with kosher salt and pepper. Set aside while you prepare the sauce.
2. Place water, tamarind (or lime juice + soy sauce), garlic, sugar, ginger, cilantro, chile, and fish sauce in a food processor. Process well (OR chop and mix by hand). Check for seasoning- if you want more salt, add a small amount of fish sauce to taste. If you want it sweeter, add a little more brown sugar to taste.
3. Coat fish with flour. Shake gently to remove excess flour.
4. Heat oil in pan over medium heat. When the oil is hot, add fish one filet at a time. Allow to cook 3-4 minutes per side. Do not turn until fish is brown on one side or the fish may stick to the bottom of the pan. Fish should be golden brown and should flake easily.
5. Once fish is cooked top with cilantro chile relish and serve over jasmine rice.

Posted in General Announcements, Quick and Easy Recipes, Seafood Dishes | 1 Comment

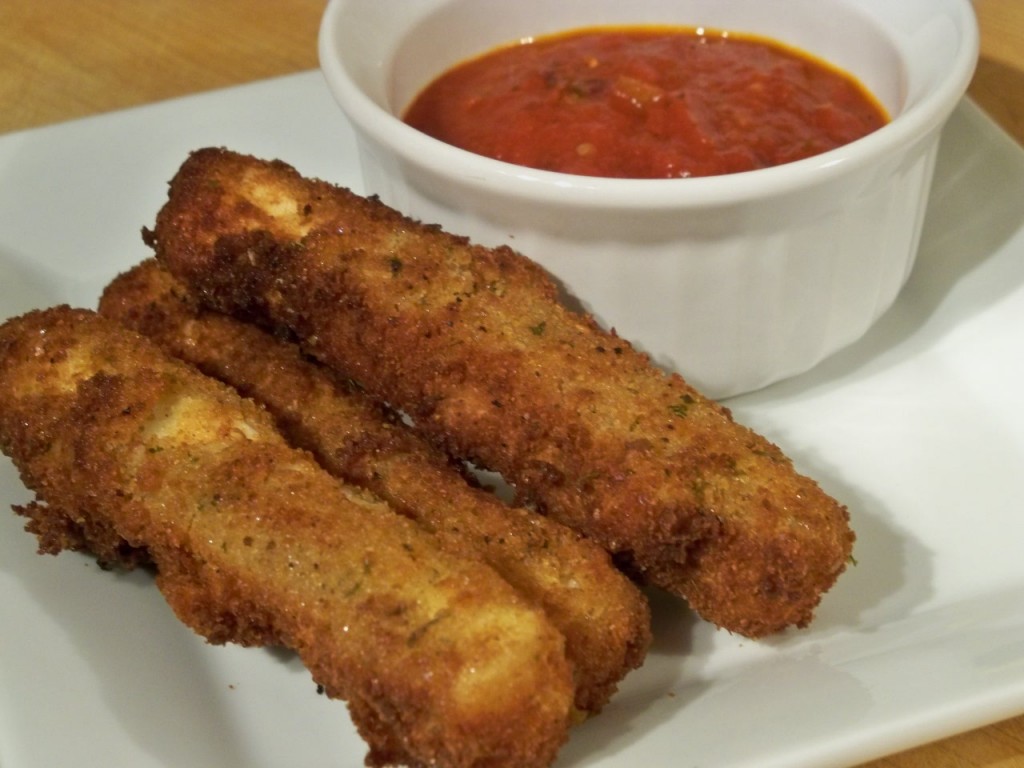
Fried Mozzarella Cheese Sticks

I’m going to sound like I’m just making excuses, but we rarely fry food. (It’s true!) I can’t stand the way it makes my house smell, not to mention sometimes you just feel terrible afterwards. I was willing to look past both of those things to make these yummy cheese sticks. Sure, I wouldn’t make them very often because lets face it people, they are still deep-fried cheese but heck for the occasional splurge they were pretty stinking delicious!
I did change the method slightly for the breading of the cheese sticks after reading several reviews of the recipe. I served them with some of my homemade spicy marinara sauce but any good jarred marinara will work just as well.
Sorry if the picture isn’t great-it is hard to focus on pictures when you keeping smelling fried cheese. I was weak! ha!

Prep time: 5-10 minutes
Cook time: 30 seconds (no really)

Fried Mozzarella Cheese Sticks

2 eggs, beaten
1/4 cup water
1 1/2 cups Italian seasoned bread crumbs
2/3 cup all-purpose flour
1/3 cup cornstarch
4 cups oil for deep-frying (I used canola, vegetable or peanut oil would work here as well)
1 (16 ounce) package mozzarella cheese sticks

Directions
1. In a small bowl, mix the eggs and water.
2. Pour the breadcrumbs into one medium bowl. In another medium bowl, blend the flour and cornstarch.
3. In a large heavy saucepan, heat the oil to 365 degrees F (185 degrees C).
4. One at a time, coat each mozzarella stick in the flour mixture, then the egg mixture, then in the bread crumbs. Once coated, dip back into egg mixture and then back into the breadcrumbs. Make sure the breading has covered the entire cheese stick. This will help keep the cheese from leaking out. Before frying the entire batch, do a test piece. Fry one cheese stick until golden brown (about 30 seconds) and remove from pan. You should be able to gently turn it and remove it from the pan with a set of tongs.
Next, add your remaining breaded cheese sticks into the oil. You may need to do this in batches of 4 or so. Fry until golden brown, about 30 seconds. Remove from heat and drain on paper towels. Serve with marinara (or ranch dressing if you like).

Posted in Appetizers, General Announcements, Quick and Easy Recipes | 5 Comments

Menu: 9/11-9/17

It’s hard to believe that summer is coming to a close. Even though it’s still hot here in Florida, you can almost smell Fall in the air! I’m really looking forward to making soups and baking anything and everything pumpkin. It’s another hectic week here at our house, let’s hope we can stick to our menu.

Sunday: Dinner with friends, not quite sure whats on the menu yet. It may be Saucy Garlic chicken.

Monday: Class

Tuesday: French onion soup and a salad

Wednesday: Thai Chile Cod, curried corn, herby jasmine rice

Thursday: Roast Chicken, mashed potatoes, roasted veggie (maybe green beans)

Friday: Hubby is having a surgical procedure done, so depending on how that goes- either takeout or leftovers.

Saturday: Chicken and white bean enchiladas with creamy salsa verde sauce

Posted in General Announcements, Menu Plan Suggestions | Comments Off on Menu: 9/11-9/17